CAGD-112
Digital Photography - 112 - Spring 2018


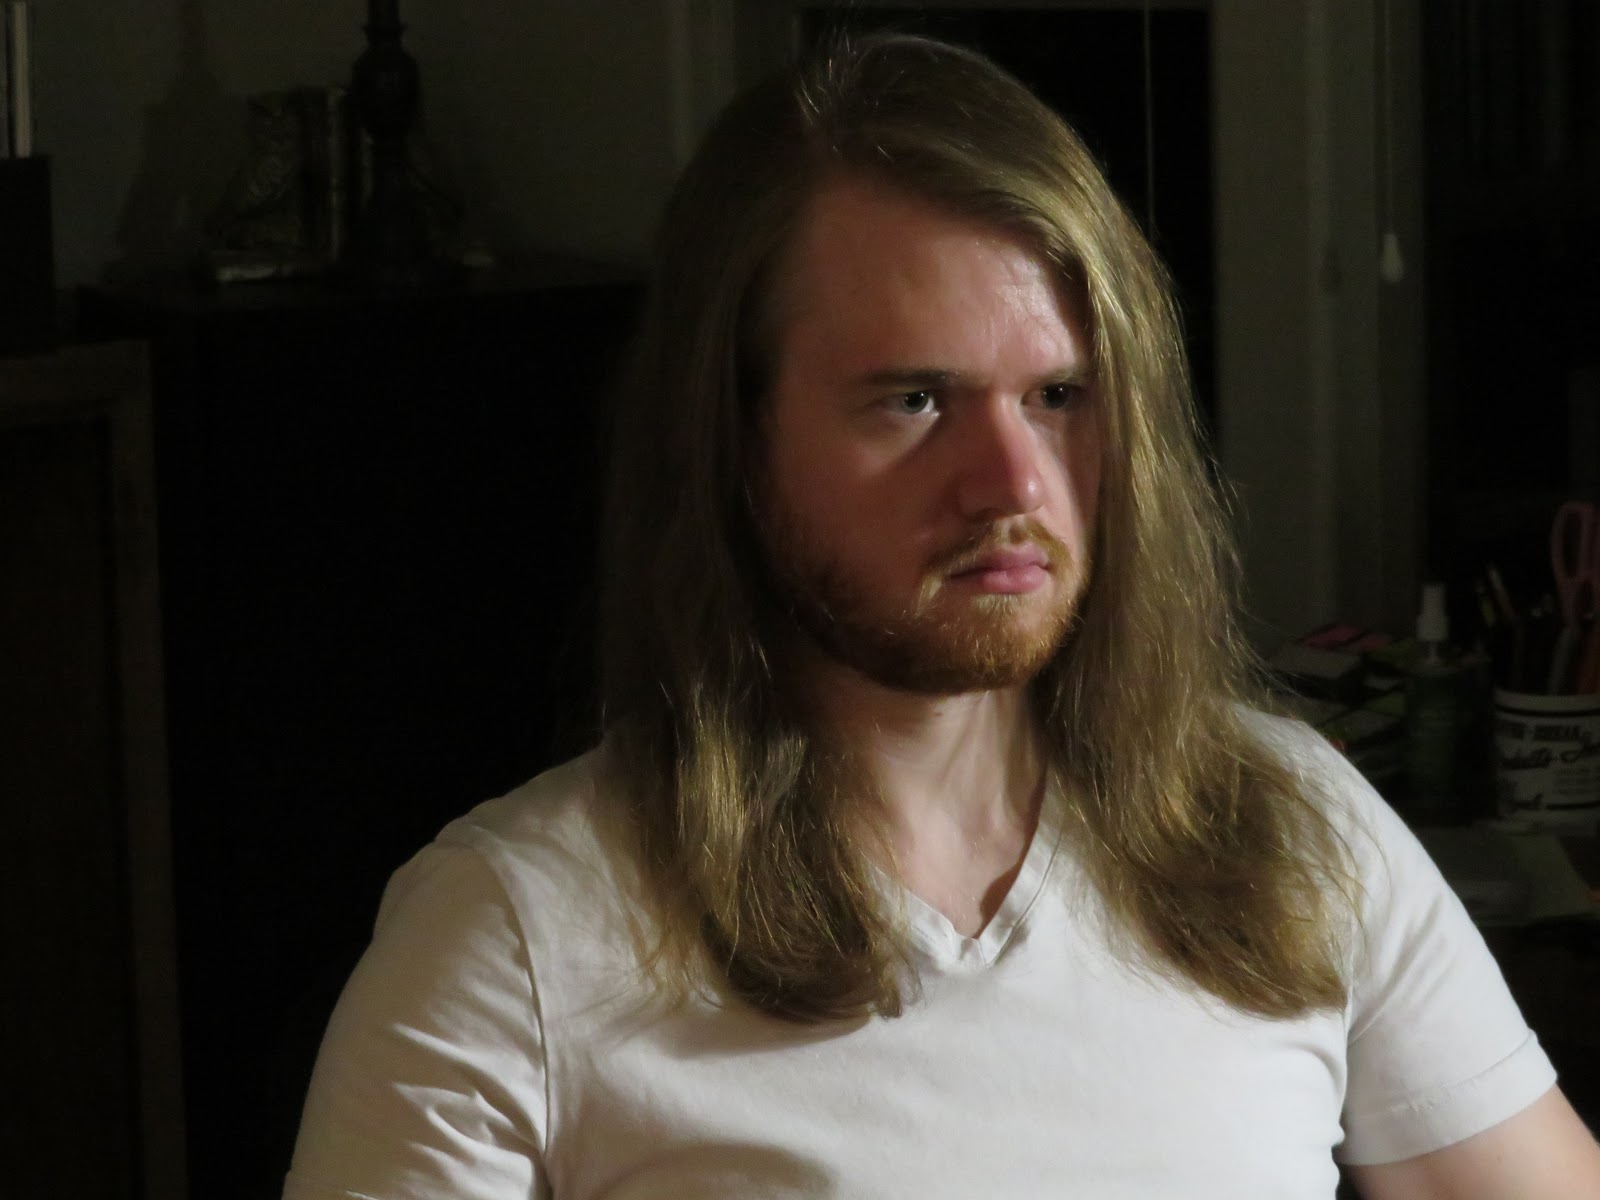
 Bryce E. in Artificial Light: Back Lit


Hyper-Realism 5/11/18

Composition of Gilbert Cat on Lamppost Watching Doors


Original photo of freshly shaved Gilbert and two shots of a SaveMart East Ave Chico Lamppost


Me reflected in two doors on Cohasset Ave
Composition Restrictions:
- Having researched hyper-realistic concept images, sketch out one of your own
- Take a series of photos and choose which ones you want to mask or green screen into shape
Post-Production Restrictions
- Assemble your piece with the general tools available

Proof of Concept with Costello the Cat
I was lucky enough this semester to be in the same class as someone taking worm's eye views of lampposts in a way that enhanced the lines converging on a symmetrical bulb that strongly reminded me of a path leading to a doorway. Taking this as inspiration I set out to make my own interpretation of the effect. After wandering around campus and visiting several parking lots I found an interesting tri-pronged one with lights that glowed green under the camera. A number of shots later I found I had two images that were almost identical with small divergence of angle and focus, so I layered them on top of each other for a slightly surreal effect.
After taking this set of photos I went home to capture my cats in the generally similar early evening light, one of whom proved much more cooperative than the other - who'd I'd already photographed for a test build of the concept. For the record, the other two concepts I'd sketched out were a human with a keyhole for a head and chest, as well as a person holding a cat - except the person was invisible and you could see straight through the cat to the wall behind them where the person's hands would be.
Having managed to photograph Gilbert with his lion cut and his ears perked up and knowing I had a green glowing light already, I was strongly tempted to switch out the doors for a fish tank full of animals and ultraviolet light, but was unable to source fresh images in time, so I went with my standby. I had recently seen a great example of a student capturing themselves in a pair of sunglasses so I went with a pair of reflective doors rather than my original concept of a solid doorway or a garden gate,
Assembling the pieces went smoothly, but this was definitely a project I feel I should have started running through Photoshop sooner as, while the color tones on the cat went fairly well, the shadows and the highlights could use some work. Gilbert's picture could also have been rotated a bit to better fit the pole's orientation and increase his focus on the 'doors'. The suggestion to crop the image to reduce the amount of space devoted to featureless sky popped up in the review forum and I agree that it may also have helped the composition.
Looking through Pinterest and other searches for a close match on the concept art I was unable to find a worked hyperrealistic image of water pouring from a televised aquarium to soak the floor as a cat pays close attention, although I'm fairly certain I've seen one before, so I decided to focus on the door motif instead.
Looking through Pinterest and other searches for a close match on the concept art I was unable to find a worked hyperrealistic image of water pouring from a televised aquarium to soak the floor as a cat pays close attention, although I'm fairly certain I've seen one before, so I decided to focus on the door motif instead.
Portrait 4/20/18

Retouched Photo

Fellow Digital Photography Student, Dylan Loe
Composition Restrictions:
- Capture a human face with intent of making a statement about them and light and shadow
- Include as much or as little of their body and surrounding environment as needed
- You must have the subject's permission to include them in a photograph
Post-Production Restrictions
- Showcase several retouching methods reinforced by earlier tutorials
- Clearly label the methods used on each Photoshop Layer
The first day of this assignment the teacher took volunteers on a walk around campus so we could practice taking photos of each other in daylight. I'm relatively inexperienced when it comes to taking photos with a shallow depth of field (and I like the word 'bokeh' which is used to describe being out-of-focus in an artistic way) so I made sure to walk around twenty to forty feet away from a subject who was being photographed by several people and zoom in on his face. After deciding I liked the effect, I zoomed in a bit further and photograph him off-center, producing the final image.
As this was meant to show off our skills with retouching images, on my first pass through I took a spot healing brush to reduce the red of several small blemishes, slightly reduce under-eye wrinkles and remove some stray hairs. I used the smudge and blur tools to clear up some of the deeper pores, then adjusted the vibrance and color of the image via adjustment layers and masks, including the Levels tool, to refine his skin tone and darken the blacks of his hair and shirt. This altered part of the background in a way I didn't like so I masked part of it out and called the image good as a whole.
Portrait Lighting 5/18/18
Composition Restrictions:
- Take four portrait shots under various lighting conditions
- One of natural light
- Two of manmade key lighting, with and without additional fill
- One back lit, source irrelevant
- You must have the subject's permission to include them in a photograph
Post-Production Restrictions
- Keep processing confined to black and white color connversion
- One of natural light
- Two of manmade key lighting, with and without additional fill
- One back lit, source irrelevant


CAGD Student, natural sunlight
Given the opportunity to take photos with other students working on this assignment, I collected several photos across a range of sunlight and shade. I decided that this one had the most promise as the controls available to me for the black and white filter left him surprisingly grizzled looking. I am curious if any photos of me taken that day wound up being used this semester...


Bryce E. in Artificial Light: Key
Careful review of the other photos taken for the main portrait assignment had me realizing I was a bit short so I went over to one of my friend's houses shortly after sunset to fill out the rest of the prompts. I'm really happy with how his eyes keep their gleam under black and white. Having a rolling chair and a lamp with bendable heads definitely helped capture this side-lighted pose that at least attempts to create a triangle of light under the eye.

Bryce E. in Artificial Light: Key and Fill
After readjusting for white balance, producing warmer tones, I added a fill light in the form of a second lamp across from the taller one. The new set up helped enhance reflections in his hair and lighten the shadows, but I think the effect may have been better had I swapped out for a brighter fill light.


The back lit image was the hardest for me to take as I had neglected to bring a tripod to this shoot and the slower shutter speed needed to capture a minimum of facial features in this condition resulted in a number of photos being too blurry to submit. I chose this one as the loose hairs catch the light well and the streak of brighter hair running down the near-center of the face helps to add definition.
HDRI 4/14/18

Over Exposed Tree, North of Eaton Road in Chico

Medium Exposed Tree

Under Exposed Tree

Color-Adjusted High Dynamic Range Image
Composition Restrictions:
- Take shots of the same subject at over, medium, and under levels of exposure
Post-Production Restrictions
- Combine these using the automated HDRI tools in Photoshop to produce a striking picture
This was my first main introduction to High Dynamic Range Images by name and I'm impressed with the body of work out there. For some reason I had trouble following the instructions given and ran out of time on the due date to submit a properly altered picture. When I heard that this was required for the blog I took the opportunity to scrap my first mix of these photos and try again in a more focused manner. I'm happy that the greens are richer and the yellows are brighter, but I am still somewhat concerned about the blue and grey mix of the sky.
Panorama 4/14/18
 Original Photo Composition of Chico's DeGarmo Park
 Exposure Corrected Layers
Composition Restrictions:
- Take a series of four to six shots suitable to be stitched into a panorama
- Use a tripod for maximum steadiness while turning the camera
- Must be outdoors
Post-Production Restrictions
- Don't use the enhanced auto-blending features of Photoshop beyond the basic projection
- Save a layer with a copy of the original image before you start correcting
- Use masks and Fills to create a relatively seamless photomerge
I tend to enjoy making panoramas and was quite happy to break out my tripod for this assignment. Unfortunately I had waited until the last day to take my sets of images so my selection choice of locations was impaired by time and the sudden onset of rain. I was pleased to find DeGarmo park in good order – although in drier weather I would have taken some shots from the upper walkway of the jungle gym.
After following the tutorial on using a Cylindrical projection I had little issue building up enough layers of Auto Contrast and fine adjustments to get colors straight across the image. I had needed seven images to do a full 360 degree panorama rather than the required six but this was deemed acceptable. I had insecurity about how much I should scale down the rather large image but keeping it to six inches tall seemed to work out fine.
 The largest seam that needed to be fixed with a Fill
I tend to enjoy making panoramas and was quite happy to break out my tripod for this assignment. Unfortunately I had waited until the last day to take my sets of images so my selection choice of locations was impaired by time and the sudden onset of rain. I was pleased to find DeGarmo park in good order – although in drier weather I would have taken some shots from the upper walkway of the jungle gym.
After following the tutorial on using a Cylindrical projection I had little issue building up enough layers of Auto Contrast and fine adjustments to get colors straight across the image. I had needed seven images to do a full 360 degree panorama rather than the required six but this was deemed acceptable. I had insecurity about how much I should scale down the rather large image but keeping it to six inches tall seemed to work out fine.

The largest seam that needed to be fixed with a Fill
Things 3/9/18


Original Photo of Cat Toys and their Adjusted Version


Composition Restrictions:
Composition Restrictions:
- Take shot with subject within five feet of camera
- Remember the lessons of On The Edge
- Use Leading Lines to corral the viewer's eye
Post-Production Restrictions:
- Use Adjustment Layers To Preserve Original Image
After photographing a number of different textures I eventually decided on some cat toys with a smooth plastic surface that contrasted nicely with the fuzziness of the carpet and fabric in the background. My original shot was framed on either side with the painted wooden rails of the stairs, but I decided to crop the rightmost one out as it wasn't needed for the image. I went with the angle that showed the orange dangly cat toy for a bit of splash of color amongst the soft blue.
After brightening the image and masking out the top half so I could adjust colors freely without dimming the yellows of the cat toys, I went back and masked out some of the adjustments I had made to create artificial shadows in hopes of drawing the eye along the curve of the ball and its holder.
Edge 2/23/18


Original Photo of Chair at Blackbird Cafe and its Adjusted Version
Composition Restrictions:
- Take shot with subject at least five feet away
- Remember rule of thirds
- Position subject on edge of screen
- Use Adjustment Layers to Preserve Original Image
- Render Image in Black and White
- Use Levels to Get Certain 'Colors' to Pop More
For the first major assignment in this photography class, I spent a lot of time photographing people and cars positioned so that the focal point wasn't in the center pf the screen but still drew the eye. I felt what I had shot to be relatively unsatisfying until I found this chair with an interesting pattern. The windowshade nicely captured the silhouette of the tree standing outside the Blackbird Cafe so I spent some time adjusting the exposure settings of the camera to preserve the detail, to better break up the lightness that contrasted with the chair.
Given that a lot of videos had emphasized the importance of leading lines, after I applied the Black and White Adjustment Layer in Photoshop I went ahead and created another layer to make use of the Burn tool and darkened the areas around the chair to draw the eye. I also made an arrow shape in the upper left corner of the sign pointing towards the chair.
I spent a bunch of time false-coloring the image using the available sliders so that the formerly dark reds of the chair's flowers shone as a bright white. I enjoyed this process and am pleased with how it helps the cushions stand out from the nicely detailed texture of the surrounding wood.


Comments
Post a Comment